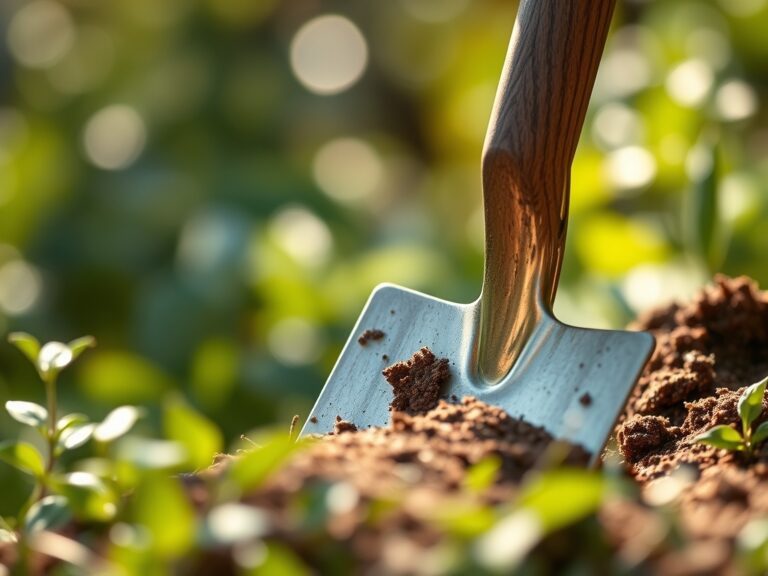
8 Tips to Use a Shovel for Landscape Grading
The scent of damp, disturbed earth signals the release of geosmin as the steel blade shears through the organic layer. High turgor pressure in surrounding turfgrass ensures the blades remain upright against the weight of the tool; however, the structural integrity of the soil profile depends entirely on the precision of the cut. Using a shovel for landscape design is not merely an act of manual labor but a surgical intervention into the rhizosphere. Effective grading requires an understanding of soil compaction and the gravitational movement of interstitial water. When the angle of repose is calculated incorrectly, the resulting erosion can strip the A-horizon of its nutrient density within a single season of heavy precipitation. A master horticulturist recognizes that every strike of the spade alters the Cation Exchange Capacity (CEC) by exposing buried minerals to oxidation. Precision grading ensures that surface runoff is directed away from foundational structures while maintaining the hydraulic conductivity necessary for deep-root establishment. The goal is a stable, functional topography that supports plant physiology through optimal drainage and structural support.
Materials:
Successful grading begins with the substrate. The ideal material for structural grading is a **friable loam** consisting of approximately **40 percent sand, 40 percent silt, and 20 percent clay**. This ratio provides the necessary macropores for oxygen diffusion and micropores for water retention. Before moving earth, test the soil pH; most landscape plants thrive in a range of **6.0 to 7.0**. If the pH is below **5.5**, aluminum toxicity becomes a risk.
For the nutrient profile, incorporate a slow-release fertilizer with an NPK ratio of 10-10-10 into the top 6 inches of the graded area to support initial root colonization. If the soil is heavy clay with a high CEC, add gypsum to displace sodium and improve flocculation. Avoid using pure sand over clay, as this creates a concrete-like texture that inhibits root penetration and lowers the hydraulic conductivity of the site.
Timing:
In Hardiness Zones 4 through 7, the window for major grading opens after the spring thaw but before the summer solstice. Soil must be worked when it is "moist but crumbly." Working saturated soil leads to puddled aggregates and severe compaction, which destroys the soil structure for years. The biological clock of the landscape dictates that grading should occur during the transition from dormancy to the vegetative stage.
For Zones 8 through 10, grading is best performed in late autumn or early spring to avoid the extreme heat that causes rapid moisture loss and plant senescence. Aim for a soil temperature of at least 55 degrees Fahrenheit to ensure that any turf or groundcover installed post-grade can initiate immediate root growth. Monitor the local frost-date window; grading should be completed at least four weeks before the first hard freeze to allow the soil to settle and prevent frost heaving.
Phases:

Sowing and Base Preparation
The first phase involves stripping the sod and stockpiling the topsoil. Use a sharp-edged spade to cut 3-inch deep sections. This depth preserves the majority of the beneficial microbial population located in the upper soil layers. Ensure the subsoil is sloped at a minimum 2 percent grade (a 1/4-inch drop per linear foot) away from buildings.
Pro-Tip: Maintaining the biological integrity of the stockpiled soil is vital. Do not pile topsoil higher than 3 feet to prevent anaerobic conditions at the base, which can kill beneficial aerobic bacteria and fungi.
Transplanting and Contouring
When using a shovel for landscape design to create berms or swales, use a round-point shovel for bulk movement and a square-point shovel for leveling. For transplanting into the new grade, dig a hole two times wider than the root ball but no deeper. This prevents the plant from settling too deep, which leads to stem rot.
Pro-Tip: When backfilling, do not pack the soil with your feet. Use water to settle the earth. This prevents mechanical compaction while ensuring "soil-to-root contact," which facilitates mycorrhizal symbiosis and nutrient uptake.
Establishing the Grade
The final phase is the "fine grade." Use a landscape rake to remove stones larger than 1 inch in diameter. The surface should be smooth enough that water cannot pool in micro-depressions. Apply a 2-inch layer of organic mulch to protect the new grade from crusting caused by raindrop impact.
Pro-Tip: Leave the root flare of newly planted trees visible. Covering the flare suppresses auxin transport and can lead to the development of girdling roots, eventually killing the specimen.
The Clinic:
Physiological disorders often arise from poor grading techniques. Identifying these early prevents long-term plant loss.
-
Symptom: Iron Chlorosis. Yellowing leaves with green veins in new growth.
Solution: This often occurs in over-saturated, poorly graded soils where high pH renders iron insoluble. Improve drainage by increasing the slope to 3 percent and apply chelated iron. -
Symptom: Root Hypoxia. Wilting despite wet soil, foul odor from the ground.
Solution: The soil is compacted or "drowned." Use a soil moisture meter to confirm saturation. Re-grade the area to eliminate standing water and incorporate perlite or coarse organic matter to increase air porosity. -
Symptom: Nitrogen Deficiency. General paling of older leaves (senescence).
Solution: High-carbon mulches used on new grades can "lock up" nitrogen. Apply a quick-release high-nitrogen fertilizer (20-0-0) to restore the NPK balance. -
Fix-It: Phosphorus Lockout. Stunted growth with purple-tinted foliage.
Solution: Often caused by cold, wet soils in poorly graded low spots. Ensure the soil temperature is above 60 degrees Fahrenheit and check that the pH is not below 6.0.
Maintenance:
A newly graded landscape requires precise hydration. Deliver 1.5 inches of water per week at the drip line of plants, ideally in two separate sessions to encourage deep root penetration. Use a soil moisture meter to ensure the water reaches a depth of 6 to 8 inches.
Keep tools in peak condition. Use a file to sharpen your shovel blade at a 45-degree angle for cleaner cuts through roots. Clean your bypass pruners and hori-hori knife with isopropyl alcohol after every use to prevent the spread of soil-borne pathogens. Inspect the grade after the first three major rain events; fill any "birdbaths" or depressions immediately to prevent localized soil souring.
The Yield:
If the graded area includes a cutting garden or edible crops, timing the harvest is essential for cellular turgidity. Harvest leafy greens and flowers in the early morning when turgor pressure is at its peak. Use a sharp hori-hori knife to make clean vascular cuts, preventing the crushing of xylem and phloem tissues. For "day-one" freshness, immediately plunge stems into 40-degree Fahrenheit water to slow the rate of respiration and transpiration.
FAQ:
How do I check the slope of my grade?
Drive two stakes into the ground 10 feet apart. Run a string between them using a string level. Measure the distance from the string to the ground at both ends to calculate the "drop" or percentage of the slope.
What is the best shovel for heavy clay?
A round-point shovel with a high-carbon steel blade is best. The pointed tip concentrates force to break through the dense plate-like structure of clay. Keep the blade lubricated with silicone spray to prevent the clay from sticking.
Can I grade soil around existing trees?
Adding more than 2 inches of soil over the root zone of an established tree can cause suffocation. Most feeder roots exist in the top 6 inches of soil and require oxygen. Use a retaining wall to keep the original grade.
How do I prevent erosion on a new slope?
Install a biodegradable coconut-fiber blanket over the fresh grade. This protects the soil from "splash erosion" while allowing seeds to germinate. The blanket will decompose as the root systems of the new plants take over structural stabilization.